Chicken preparation
How to remove skin from chicken drumsticks: comparing the methods
Drumstick skin is slippery and firmly attached near the narrow end. A paper towel is usually the easiest answer, while kitchen shears or clean food-only pliers can help when the skin refuses to release.
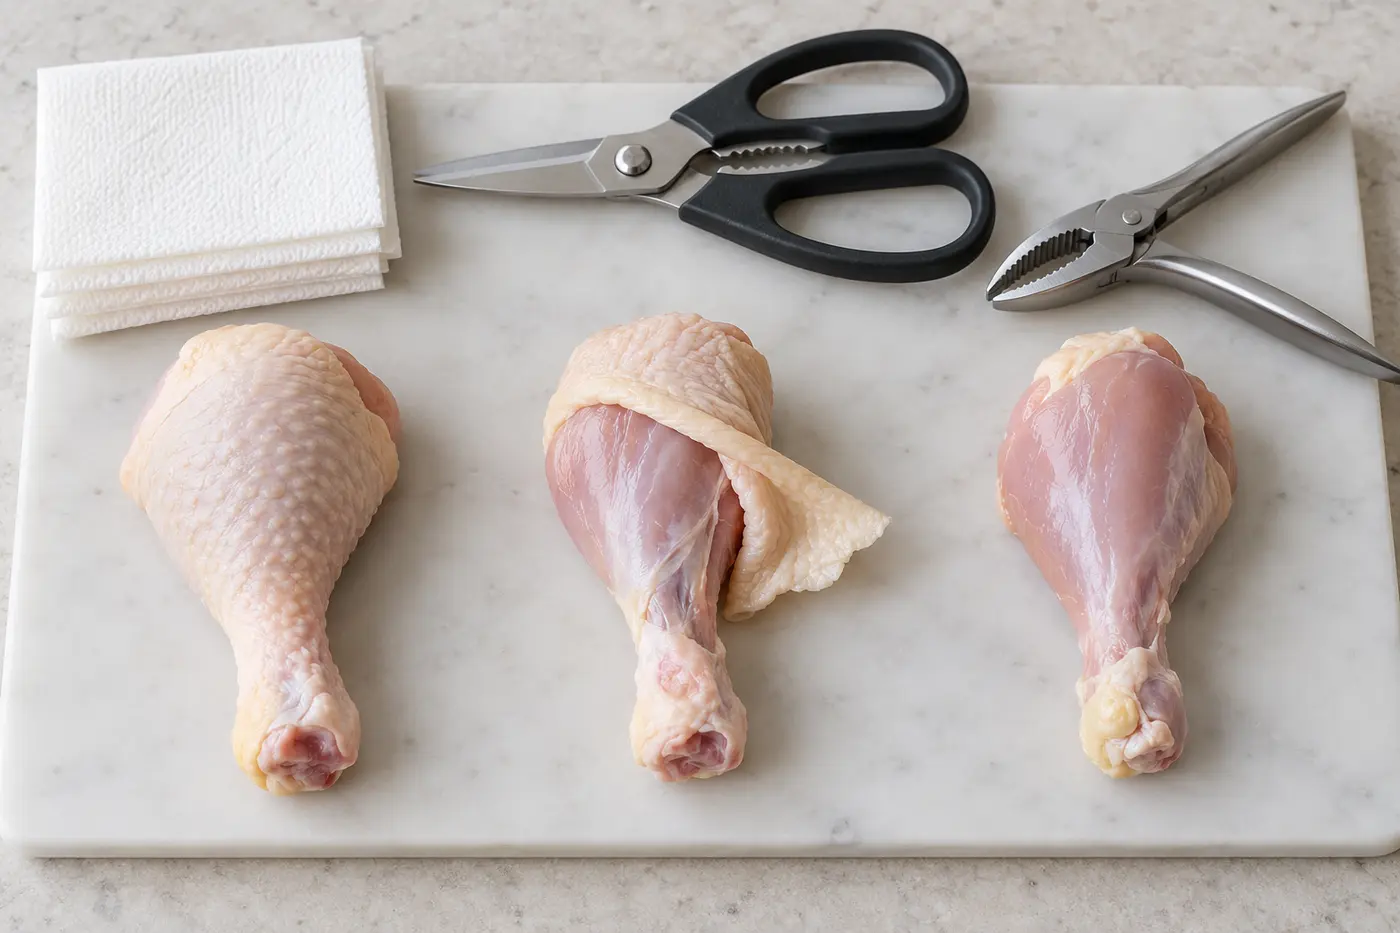
Removing drumstick skin can reduce the amount of skin and surface fat in the finished dish, help seasoning contact the meat, and prevent soft skin in moist cooking methods. It is optional: leaving the skin on can protect the meat during dry-heat cooking and provide crispness when browned properly. The best choice depends on the recipe.
Prepare the work area first
- Work with cold drumsticks directly from the refrigerator.
- Use a dedicated cutting board or another nonporous surface that can be cleaned thoroughly.
- Place paper towels, shears, or food-only pliers within reach before opening the chicken.
- Keep vegetables, cooked food, spice containers, phones, and serving utensils outside the raw-chicken area.
- Set out a small discard bowl or bag so removed skin does not touch the counter.
Patting the skin with a disposable paper towel improves grip. Do not wash the chicken first; rinsing does not make it safer and can spread contaminated droplets.
Method 1: pull with a paper towel
Best for: most drumsticks, minimal equipment, and fast batch preparation.
- Hold the meaty end of the drumstick firmly with one hand.
- Use a folded paper towel to grasp a loose edge of skin near the thick end.
- Pull the skin down toward the narrow ankle end in one steady motion, turning the drumstick as needed.
- If the skin stops at the bottom, use clean shears to snip the final attached band rather than tugging hard.
Advantages: inexpensive, quick, little risk of cutting the meat, and the towel can be discarded immediately. Limitations: it may take more hand strength, and very wet or tightly attached skin can still slip.
Method 2: loosen and trim with kitchen shears
Best for: skin that tears, connective tissue around the ankle, or small stubborn patches.
- Lift an edge of the skin with your fingers or a paper towel.
- Slide the lower blade of sturdy kitchen shears just beneath the lifted skin, keeping the point angled away from your supporting hand.
- Snip only the tough connective strands or the narrow band at the ankle.
- Return to the paper-towel grip and pull off the loosened skin.
Advantages: controlled and effective on stubborn attachments. Limitations: slower for a large batch, creates more surfaces to sanitize, and careless cutting can remove meat or cause the shears to slip. Shears work best as a helper—not as a way to carve every piece of skin from the drumstick.
Method 3: use clean food-only pliers
Best for: people with limited grip strength, unusually slippery drumsticks, or large batches.
- Use stainless-steel pliers reserved exclusively for food preparation. Never bring workshop pliers into the kitchen.
- Grip a loose flap of skin gently; do not clamp into the meat or against the bone.
- Hold the thick end of the drumstick and pull the skin toward the ankle with steady pressure.
- Snip any final attachment with kitchen shears.
Advantages: strong grip and good leverage with less finger strain. Limitations: unnecessary for most cooks, easier to squeeze too hard, and hinges or serrations require careful cleaning. Choose a simple tool that can be fully washed and sanitized; replace it if it rusts or cannot be cleaned completely.
Method 4: remove the skin after cooking
Best for: people who want the skin to protect the meat during cooking but do not intend to eat it.
Once the drumstick is safely cooked and cool enough to handle, the skin often pulls away more easily with clean tongs or a fork. This method requires no raw-skin wrestling, but it does not give seasonings direct contact with the meat before cooking, and some rendered fat will already be present in the cooking liquid or sauce. Hot skin can also tear, so avoid handling it with bare fingers.
Side-by-side comparison
| Method | Speed | Grip or control | Cleanup | Best use |
|---|---|---|---|---|
| Paper towel | Fast | Good on most pieces | Least tool cleanup | Best first choice for everyday preparation |
| Kitchen shears | Moderate | Excellent for precise attachments | Must wash hinge and blades | Finishing stubborn skin without force |
| Food-only pliers | Fast after setup | Strongest grip | Requires careful hinge cleaning | Large batches or reduced hand strength |
| After cooking | Easy per piece | Skin often releases readily | No raw-skin tool | When skin is useful during cooking but not for serving |
Methods to avoid
- Rinsing the chicken: it can spread bacteria through splashing and does not replace proper cooking.
- Pulling toward an exposed knife blade: slippery poultry and force are a poor combination.
- Using ordinary workshop tools: lubricants, rust, debris, and hard-to-clean surfaces make them unsuitable for food.
- Holding the bone end with a loose towel while cutting toward your hand: stabilize the drumstick and keep cutting edges pointed away.
- Using color to judge doneness: verify 165°F in the thickest meaty portion without touching bone.
Cleanup after raw chicken
Discard used paper towels and skin without touching other surfaces. Wash your hands with soap and water for at least 20 seconds. Wash the cutting board, shears, food-only pliers, utensils, and counter with hot, soapy water, then sanitize food-contact surfaces according to the product label or your dishwasher's suitable sanitizing cycle. Do not reuse a plate or utensil that held raw poultry until it has been thoroughly cleaned.
Related recipes and guides
Put the technique into practice with our firsthand creamy ranch chicken drumsticks. You can also browse our slow-cooker chicken recipes, learn the simplest ways to shred cooked chicken, or review our lean beef and chicken nutrition comparison.